4.11. Options
A tap on the Options button in the main menu shows a panel options organized in sections. A tap on one of the sections expands (or collapsed) the underlying details. Please see the sections below for a detailed description:
Note
Due to Admin Privileges the Option panel might be disabled and certain buttons not visible.
4.11.1. User Source
This section is about the configuration of external and internal sources for user data and authentication.
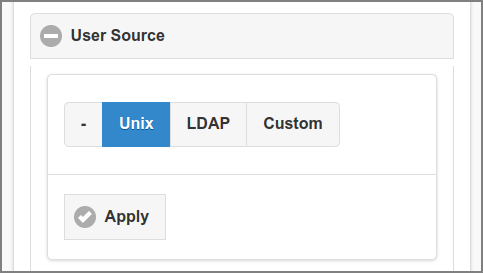
Admin Web App: Options - User Source
Tap the – button if you do not want to import users from a standard external source.
If PaperCut is enabled as User Source, it will show up below the radio buttons. See PaperCut as User Source in SavaPage.
In other cases, remember to enable the Internal Users feature if you want to acquire any user into the system.
Tap the Unix button if you want to import Unix user accounts defined on the SavaPage host.
Tap the LDAP button to import users from an existing LDAP domain. This includes OpenLDAP, FreeIPA, Apple Open Directory, Novell eDirectory, Microsoft Active Directory and Google Cloud Directory. When this option is selected the LDAP connection data are shown.
Tap the Custom button if you want to interface with external user sources using custom programs (plug-ins).
Press the Apply button to commit the changes.
Note
If the User Source changes, the restriction Import users from group is reset to [All Users]. See User Creation.
4.11.1.1. Unix
This option imports user accounts that are setup and defined on the
local system as standard Unix accounts or mapped into the system from a
central directory service such as LDAP via nsswitch.conf and PAM.
Most large established Unix networks will support this option.
4.11.1.2. LDAP
LDAP (Lightweight Directory Access Protocol) directories usually store information about user and groups in an organization. One of the most common uses of LDAP is to provide single sign-on on a network that comprises multiple platforms and applications. When a network consists of Windows computers only, then an Active Directory domain can be used. But when there is a mix of Windows, Apple and GNU/Linux machines then LDAP can provided the single source of user, group and authentication information. (It is worth noting that both Active Directory and Novell eDirectory implement the LDAP protocol).
SavaPage can use an LDAP directory for user authentication and as a source of user and group information. LDAP can either be enabled at installation time, or by changing the user source at this point. When enabling LDAP, a number of configuration properties must be specified to allow the application to connect to the LDAP server. Please ask your LDAP administrator what values to use for the various options.
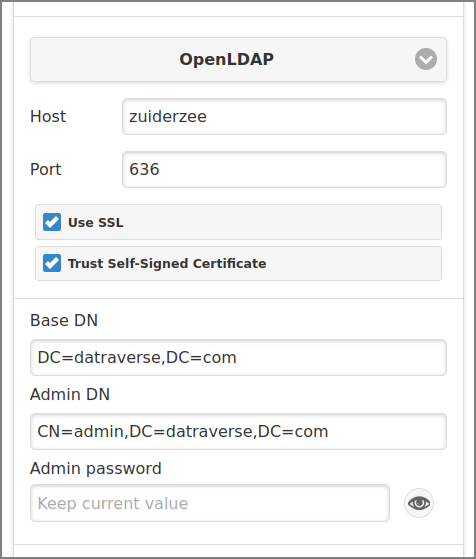
Admin Web App: Options - User Source - LDAP
The Server Type determines which LDAP fields are used to get user and group information. Select one of the following server types that SavaPage supports out-of-the-box:
-
This option is available if a Google LDAP Client Certificate is present.
When needed it is easy to support other server types by adjusting the fields SavaPage uses for LDAP searches. This is discussed in appendix_title.
Enter the IP parameters (for Google Cloud Directory parameters are read-only).
Enter the hostname or IP address of the LDAP server at the Host prompt.
Enter the IP port of the LDAP server at the Port prompt. The value defaults to
389.Tick the Use SSL checkbox to use encrypted SSL connection to connect to the LDAP server. The LDAP server requires SSL support to be enabled and should accept connections on the standard LDAPS port
636.In case you connect to a Global Catalog server (Microsoft Active Directory) [8] use Port
3268or3269(SSL).Check if you want to Trust Self-Signed Certificate of the LDAP server.
And the regular settings:
Enter the Base DN of the LDAP server at the Base DN prompt. This is the equivalent of the “suffix” config setting of the OpenLDAP server. For example, if the domain hosted by the LDAP server is “domain.com” then the Base DN might be:
DC=domain,DC=comThe format of the Base DN can differ significantly depending on the configuration. Some older Novell eDirectory installations may require a blank Base DN to operate. Some examples:
DC=myorganization,DC=com
DC=mycompany,DC=co,DC=uk
OU=OrgUnit,DC=domain,DC=com
DC=local
The Admin DN is the DN of the user who has permission to connect to and query the LDAP server. This is typically an administrative user, although it can be a user that only has read-only access to the LDAP server. An example of the DN of the Administrator user on a Windows AD domain “domain.com”, would be
CN=Administrator,CN=Users,DC=domain,DC=com. The exact format of the DN depends on the LDAP server. Some examples:Microsoft Active Directory (in organizational unit)
CN=administrator,OU=OrgUnit,DC=domain,DC=com
Apple Open Directory
uid=diradmin,CN=users,DC=domain,DC=com
OpenLDAP, FreeIPA
uid=root,DC=domain,DC=com
uid=ldapadmin,DC=domain,DC=com
Microsoft Active Directory
CN=Administrator,CN=Users,DC=domain,DC=com
Novell eDirectory
CN=root,DC=domain,DC=com
CN=ldapadmin,OU=users,DC=domain,DC=com
The Admin password is the password for the administrator specified in the Admin DN above. Leave empty to keep the current value. Use the 👁 button on the right side of the entry field to show/hide the password.
Tip
Some LDAP servers are configured to allow “anonymous” LDAP query access. In these situations, the Admin DN and Admin password can be left blank.
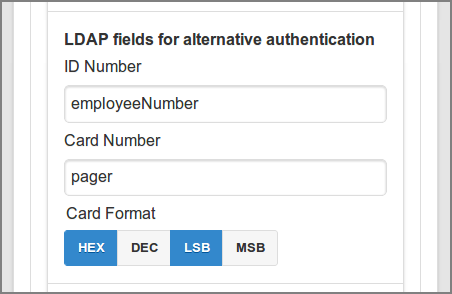
Admin Web App: Options - User Source - LDAP fields for alternative authentication
LDAP field names can be entered for the two alternative user authentication methods ID Number and Card Number, as described in User Authentication. Field names are optional and can be left empty. The Card Format is relevant if the Card Number is specified. See Card Number Format.
Important
The ID and Card Number must each uniquely identify a user, so make sure that no two users have the same number. This means that the numbers defined in LDAP should be unique. If SavaPage encounters a non-unique ID or Card Number that user will not be updated.
Note
ID Number and Card Number LDAP fields are currently not supported for Google Cloud Directory.
4.11.1.3. Internal Users
With the internal users feature you can directly manage users inside SavaPage. Enabling this feature removes the obligation to define an external User Source to create and manage Users. Of course you can enable this feature as an addition to an external source.
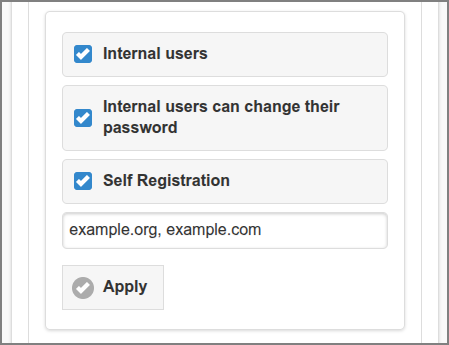
Admin Web App: Options - Internal Users
When Internal users is selected extra options appear to enable Internal Users can change their password and Self Registration. See User Details and Self Registration.
To enable Self Registration you must also enter a comma-separated list of email domains that users can use to register. In addition you can set configuration properties to override defaults.
Configuration property |
Description |
|---|---|
internal-users.registration.ip-addresses-allowed |
A CIDR Set of Client IPv4 and/or IPv6 addresses from which it is allowed to Register. Default: void (registration is allowed from all clients addresses). |
internal-users.registration.email.expiry-mins |
The number of minutes within which a pending registration must be verified.
Default: |
internal-users.registration.verify-url.authority |
The authority of the verification link. Default: void (the authority of the User Web App URI is used). |
See Config Editor on how to set these items.
Tip
Use the Server Command Tool to batch import internal users. See addInternalUser
4.11.1.4. Internal Groups
SavaPage has the ability to define internal user groups. Just like internal users these groups are internal to the SavaPage system. Internal groups are created in addition to groups already provided by the external user source and are useful in the following situations:
You have configured the system to import users from a source that does not support groups.
You do not have permission to create new groups in the user source.
You’d like to create small groups just for use within SavaPage and it’s not appropriate to great a new group in the user source.
Internal Groups are defined in a plain text file and composed of members who are either synchronized from the external user source or who were created as internal user. A fully annotated template text file is present here:
/opt/savapage/server/data/conf/internal-groups.txt.tmpl
… copy this file to …
/opt/savapage/server/data/conf/internal-groups.txt
… and start defining your groups.
Internal Groups are fully emancipated to their external fellows and can be moved in and out of scope. See Add & Remove Groups.
Warning
Internal Groups should have a name distinctive to any groups defined in your external user source. If case of a name clash, the internal group takes precedence.
4.11.2. Custom
Some organizations use software systems other that Unix and LDAP as the
primary source of user data and authentication. In these situations,
SavaPage can use custom user Synchronization and
Authentication Command Line Interface (CLI) programs (plug-ins).
Program paths are relative to /opt/savapage/server/ext .
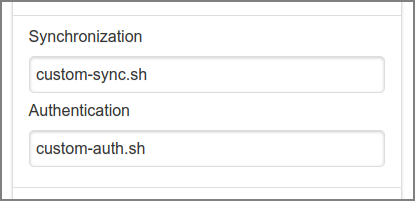
Admin Web App: Options - User Source - Custom
See User Source Plug-ins :
4.11.3. User Creation
This section is about the creation and synchronization of external users. Internal Users are created in the User Web App or with the Server Command Tool. See Create Internal User and addInternalUser.
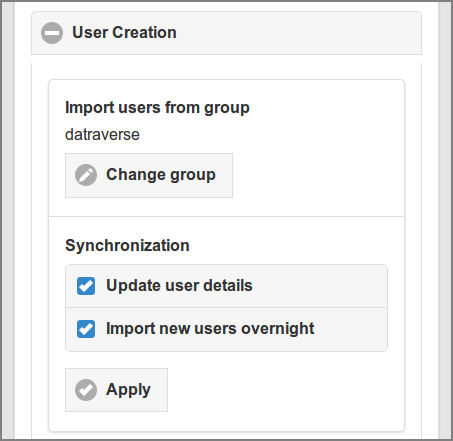
Admin Web App: Options - User Creation - Import
The Import users from group section holds an option to import a subset of users from the source by selecting a group. This option is relevant if you want to restrict access to SavaPage for a subset of external users.
A tap on the Change group button shows a list of available groups as seen in Admin Web App: Options - User Creation - From Group.
Select a group from the list and press the Apply button to commit the change, or press the Cancel button to roll it back.
Use the [All Users] button to cancel the group restriction.
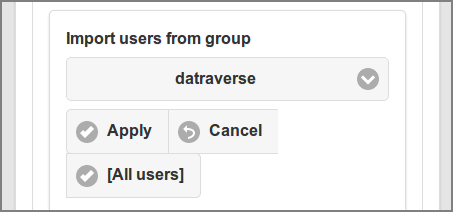
Admin Web App: Options - User Creation - From Group
Caution
In Active Directory, user group membership comes in two flavors. It
can either explicitly be assigned, or be implied by the user’s
Primary Group ID, i.e. the RID of the primary group the user is
member of. Because primary group membership is implicit, the Active
Directory API will return an empty member attribute for this
group. When users are explicitly assigned as member to groups the
API will return group members as expected.
For example, because Active Directory sets the Primary Group ID of all users to the built-in “Domain Users” group, the Active Directory API will not report any members for the “Domain Users” group.
Note
Active Directory supports an advanced feature called “Nested Groups”. This allows a group to have other groups as member. Since a sub-group can again have sub-group members, nesting can be several levels deep. When importing users from a group, SavaPage traverses the nested group tree to collect all containing users.
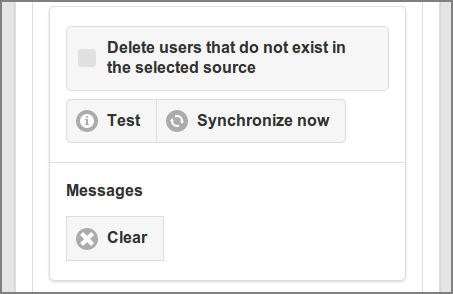
Admin Web App: Options - User Creation - Synchronize
The Synchronization section holds options for the external user synchronization process.
Tick the Update user details checkbox if you want to overwrite user details in the database with details from the source.
Caution
An external User will overwrite an internal User with the same user id: as a result the User will become external.
Select Import new users overnight to automatically synchronize daily at 10 minutes past midnight. See Daily Jobs.
Press the Apply button to commit the changes.
Press the Synchronize now button to manually start a synchronization.
Tick the Delete users that do not exist in the selected source checkbox to (logically) delete users in the database that were removed from the source. Note that this checkbox is deselected again after each synchronization.
Feedback messages from the synchronization process are real-time displayed in the Messages section. Press the Clear button to remove them.
Use the Test button to check the effect of the synchronization without updating the database. Messages are shown with a “test” prefix.
Note
Disabled Active Directory users will not be imported by default.
If you want to change this behavior you can set the value of
configuration key ldap.disabled-users.allow to Y (or enter an
empty value to fall back to the default). See Config Editor
on how to change this value.
Tip
To delete all external users, select – as User Source and use Synchronize now with the Delete users that do not exist in the selected source option.
Caution
The SafePages of external users not present in the source are deleted.
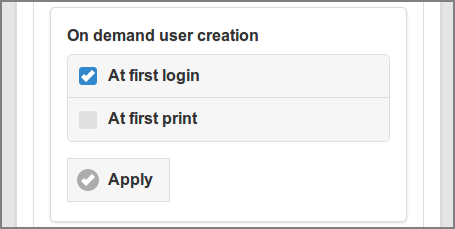
Admin Web App: Options - User Creation - On Demand
On demand user creation specifies which events, apart from regular user synchronization, will ad-hoc create new external users in the database.
If the user associated with these events is not in the database, SavaPage will check if the user is part of the User Source and thereby a sure Synchronized User candidate. If so, it will ad-hoc synchronize the user into the database.
Select At first login to ad-hoc create a user when they successfully Login to SavaPage for the first time.
This also includes an OAuth login if the OAuth provider uses the same (LDAP) user source that is configured in SavaPage as external User Source. This situation can be configured in the OAuth Plug-in properties file.
Select At first print to ad-hoc create a user when they print to a SavaPage queue for the first time.
Press the Apply button to commit the selection.
4.11.4. User Authentication
This sections describes the global defaults for User Authentication.
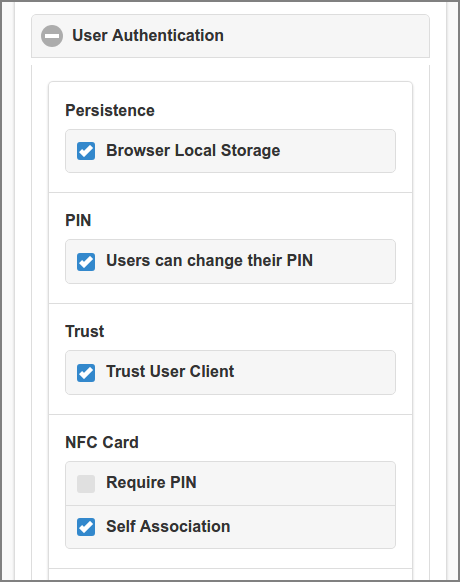
Admin Web App: Options - User Authentication
The Persistence section holds a options to persist authentication in Browser Local Storage. If enabled, a successful login to the SavaPage Web App will store an authentication token in the “Local Storage” [9] of the browser. When the user closes the browser after a successful login and opens it again, login will be automatic, without the need to authenticate again. Separate authentication tokens are held for the User and Admin Web App context. See Authentication Tokens.
Note
The presence of an authentication token is essential for the iOS Web Clip to function, and is pure convenience in other environments.
If Browser Local Storage is disabled, authentication persistence is implemented with Web Sessions.
The PIN section holds the defaults for PIN usage.
When User can change their PIN is enabled users are granted the option to change their PIN. See User Details.
If Trust User Client is enabled User Web App authentication is automatic when:
An authenticated User Client session is present at the same IP address.
The User Web App is opened with an URL parameter identifying the user from the User Client session. See URL Cheat Sheet.
The NFC Card section holds the defaults for card swipe logins using a Local Card Reader or Network Card Reader.
With Require PIN enabled the user must also provide their associated PIN. This provides additional security for swipe card logins.
If the Self Association option is selected, users are allowed to swipe cards previously not used or registered. When swiping such an unregistered card, SavaPage will ask the user if to associate the new card to their account. When the user agrees SavaPage will switch to User Name authentication. After successful authentication the new card will be registered, thereby replacing any previously associated card. This feature is available for User Web App Login only. See Card Self Association Dialog.
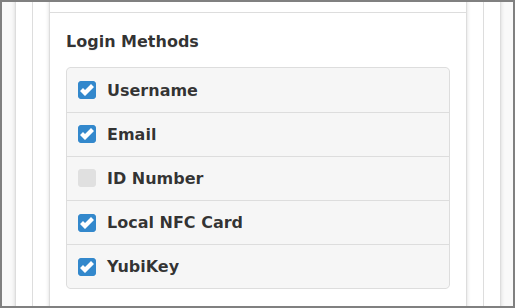
Admin Web App: Options - User Authentication - Login Methods
In the Login Methods section several login methods can be activated. When a method is activated a detailed section is shown. Detailed sections are explained in:
Important
The globally active Login Methods can be overridden for Access over Internet, and by defining Custom User Login settings for a specific Terminal.
Note
ID Numbers and NFC Card Numbers can be synchronized with an external source like LDAP, or imported from file, see setUserProperties.
4.11.4.1. Username Login
The Username login method allows a Person to use their regular username and password to login.
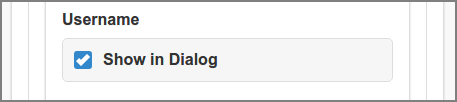
Admin Web App: Options - User Authentication - Username Login
If the Show in Dialog option is selected, the Username login
method is part of the Login dialog. If this option is disabled this login
can only be achieved by use of the login URL parameter. See
URL Cheat Sheet.
4.11.4.2. Email Login
The Email login method allows a Person to use their email address and password to login.
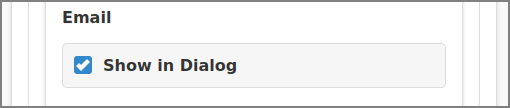
Admin Web App: Options - User Authentication - Email Login
If the Show in Dialog option is selected, the Email login method
is part of the Login dialog. When this option is disabled this login can only be
achieved by use of the login URL parameter. See
URL Cheat Sheet.
4.11.4.3. ID Number Login
The ID Number login method allows a Person to use their identity number. Identity numbers are convenient when usernames are too long or cumbersome to enter. For example, rather than entering a username like “steven.brown-002”, it is more convenient to enter the employee or student ID Number “3624”.
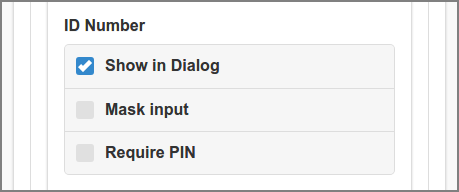
Admin Web App: Options - User Authentication - ID Number Login
If the Show in Dialog option is selected, the ID Number login
method is part of the Login dialog. if this option is disabled this login can
only be achieved by use of the login URL parameter.
See URL Cheat Sheet.
If Mask input is set the ID Number will be masked when entered (like a password).
With Require PIN set the user must also provide their associated PIN. This provides additional security for ID Number logins.
4.11.4.4. Local NFC Card Login
The Local NFC Card login method allows a Person to login by swiping an NFC Card across a Local Card Reader.
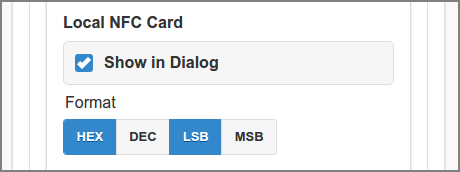
Admin Web App: Options - User Authentication - Local NFC Card Login
If the Show in Dialog option is selected, the Local NFC Card login
method is part of the Login dialog. When this option is disabled this login can
only be achieved by use of the login URL parameter. See
URL Cheat Sheet.
The Format of the card number must be specified. See Card Number Format.
Warning
This setting applies to any Local Card Reader hooked up to any device. If a card reader is used that produces a different format a Terminal definition with a Custom User Login needs to be created for the device the reader is hooked up to.
4.11.4.5. YubiKey Login
The YubiKey login method allows a Person to login with a YubiKey Token.
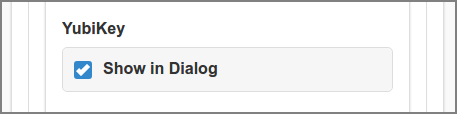
Admin Web App: Options - User Authentication - YubiKey Login
If the Show in Dialog option is selected, the YubiKey login method
is part of the Login dialog. When this option is disabled this login can
only be achieved by use of the login URL parameter. See
URL Cheat Sheet.
Get the YubiKey API credentials from yubico.com, and enter them as configuration property.
Configuration property |
Description |
|---|---|
auth-mode.yubikey.api.client-id |
The YubiKey API client ID. |
auth-mode.yubikey.api.secret-key |
The YubiKey API secret key. |
See Config Editor on how to set these items.
4.11.4.6. Default Login
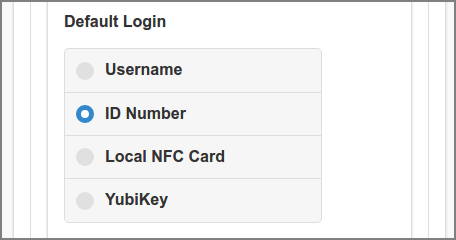
Admin Web App: Options - User Authentication - Default Login
Select the Login method that is displayed as default in the Login dialog.
4.11.4.7. 2-Step Verification
2-Step Verification is a method of confirming a user’s claimed identity by utilizing an extra factor after a successful login as discussed in the previous sections. SavaPage uses Time-based One-time Password (TOTP) as described in RFC 6238.
Authenticator apps to generate TOTP codes are widely available.
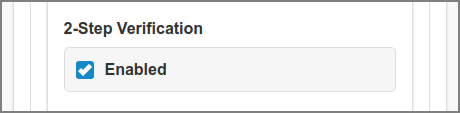
Admin Web App: Options - User Authentication - 2-Step Verification
When 2-Step Verification is Enabled, users can open the Authentication Dialog to activate their TOTP secret. Then they can utilize their Authenticator app to generate TOTP codes by scanning the QR-code. Or instead, if Telegram TOTP is enabled (see table below), they can choose to have SavaPage send a TOTP code to their Telegram ID. See Telegram Configuration.
Configuration property |
Description |
|---|---|
user.totp.issuer |
Issuer in |
user.ext.telegram.totp.enable |
Set to |
See Config Editor on how to set these properties.
Note
2-Step Verification is not applied when login to the Web App is implicit because of a redirect from a trusted OAuth provider, or trusted and authenticated User Client, or because of a One-Time Authentication Token.
Warning
Telegram support is deprecated and will be removed in a next release.
4.11.5. Mail
This section holds the settings for outgoing mail.
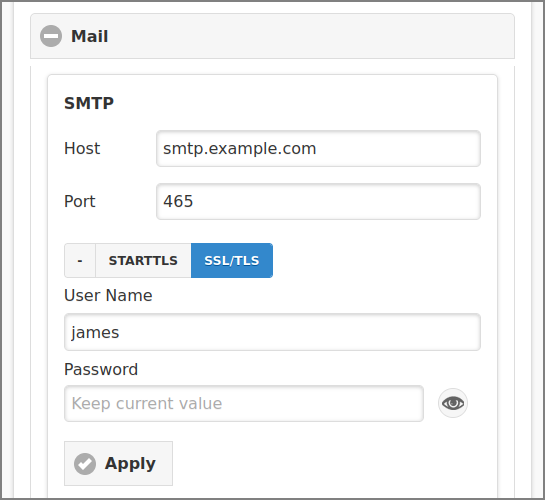
Admin Web App: Options - Mail - SMTP
Enter the SMTP connection parameters:
The host name or IP address of the Host.
The IP port at Port. The standard SMTP ports are:
25(insecure),465(SSL/TLS) and587(STARTTLS). The value defaults to465(SSL/TLS).Select the connection security: – for an insecure connection, and STARTTLS [10] or SSL/TLS [11] for a secure connection. TLSv1, TLSv1.1 and TLSv1.2 are supported.
Enter the User Name and Password if authentication is required. Use the 👁 button on the right side of the Password field to show/hide the password. Leave empty to keep the current value.
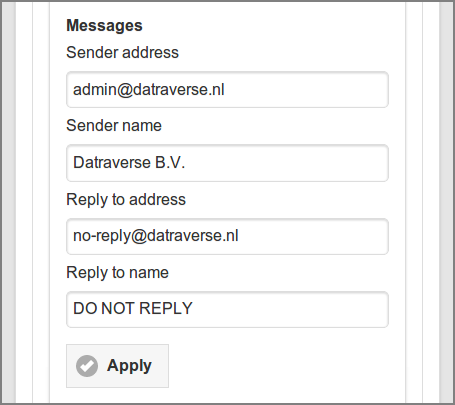
Admin Web App: Options - Mail - Messages
The Messages section holds the sender and reply parameters used for email messages send by the system:
Sender address : enter a valid email address representing the sender of the message.
Sender name : the name defaults to SavaPage.
Reply address : enter a valid email address the recipient can reply to.
Reply to name : the name to reply to.
Press the Apply button to commit the changes.
Important
The Sender address must be part of the OpenPGP key used for PGP/MIME email signing and encryption. See OpenPGP Settings.
Warning
It is strongly recommended that you use Postfix, an Open Source Mail Transfer Agent (MTA), for SMTP email transmission. This is the reference SMTP server used in the SavaPage tests. Other (proprietary) SMTP services may not function as expected.
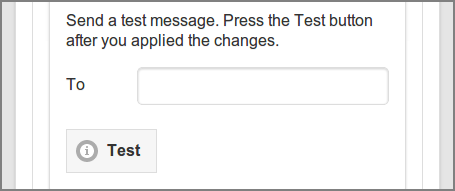
Admin Web App: Options - Mail - Test
Check if all mail parameters are valid by sending a test email.
Enter a valid email address to send a message To and press Test. Check the mailbox of the recipient to see if the message arrived.
Timeout and timing parameters can be configured as shown in the table below.
Configuration property |
Description |
|---|---|
mail.smtp.connectiontimeout |
Timeout in milliseconds until an SMTP connection is established.
Default: |
mail.smtp.timeout |
Timeout in milliseconds to send mail messages after the SMTP connection
is established, i.e. maximum time of inactivity between two data packets.
Default: |
mail.smtp.debug |
Enable ( |
mail.outbox.poll.heartbeat-msec |
Heartbeat (milliseconds) to poll the store-and-forward mail outbox
for new messages. Default: |
mail.outbox.send.interval-msec |
Interval (milliseconds) between sending each mail message.
A reasonable interval is needed to prevent mail being qualified
as spam by the SMTP host. Default: |
See Config Editor on how to set these properties.
4.11.6. Mail Print
Mail Print is an implementation of Driverless File Transfer Print which allows users to print documents by mailing them to SavaPage. The email address from the sender is used to find the corresponding Person. See Mail Print Authentication.
Note
Mail Print maps to the reserved Queue
/mailprint.
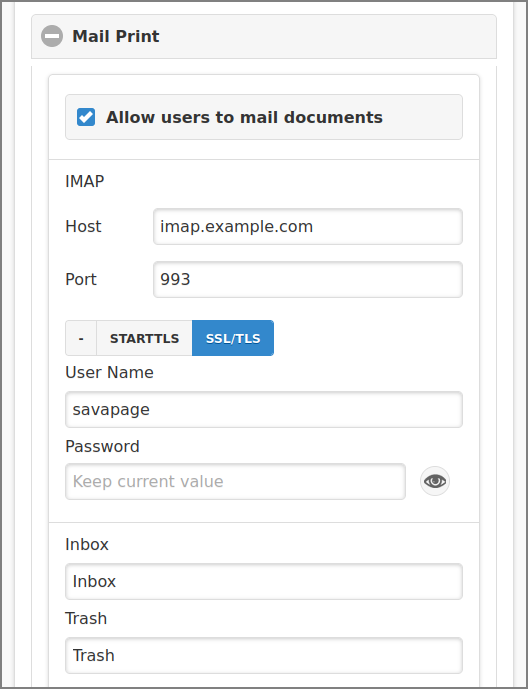
Admin Web App: Options - Mail Print (IMAP)
Check the Allow user to mail documents to enable the Mail Print function. Then enter the IMAP connection parameters:
The host name or IP address of the Host.
The IP port at Port. The standard IMAP ports are:
143(insecure),993(SSL/TLS) and143(STARTTLS). The value defaults to993(SSL/TLS).Select the connection security: – for an insecure connection, and STARTTLS or SSL/TLS for a secure connection.
Enter the User Name and Password for the required authentication. Leave password empty to keep the current value. Use the 👁 button on the right side of the Password field to show/hide the password.
Note
If IMAP OAuth Plug-in is active, User Name and Password are replaced with text “PLUGIN” and the plug-in email address.
Important
The IMAP host must support the IDLE Command, which is a widely implemented standard extension to the core IMAP protocol. See RFC2177.
Warning
It is strongly recommended that you use Dovecot, an Open Source IMAP Server, to host Mail Print messages. This is the reference IMAP server used in the SavaPage tests. Other (proprietary) IMAP services may not function as expected.
Print jobs are read from the Inbox and moved to the Trash folder after processing. Enter the name of both folders:
Inbox : the name of the Inbox folder.
Trash : the name of the Trash folder.
If Trash is a sub-folder, enter a point separated folder path. For instance, when
Trashis a sub-folder ofInbox, enter:Inbox.Trash
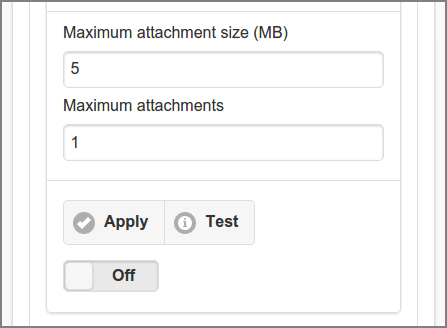
Admin Web App: Options - Mail Print (Attachments)
Limit the print job size per email message by setting the Maximum attachment size (MB) and Maximum attachments. Use integers as value. Leave empty to allow unlimited size.
Press the Apply button to commit the changes.
Press the Test button to test the connection. A feedback message will be displayed with the result.
Use the flip-switch to turn the Mail Print service On and Off. Note that after disabling the service it is automatically turned Off.
Note
Because Mail Print is an open channel, SavaPage does not reply to unknown users.
For uploaded file types that do not have a page size defined (HTML, TXT) the default paper size is used.
The Report Font is used for plain text files (TXT).
See Processing Driverless PDF Transfer on how mailed PDF documents are processed.
When no file attachments are present the message body is printed.
Configuration property |
Description |
|---|---|
print-imap.content.eml.detain |
Temporarily detain any printed message body as |
print.imap.connectiontimeout-msecs |
Socket timeout in milliseconds while establishing a connection to IMAP inbox
folder. Default: |
print.imap.session.duration-secs |
Duration in seconds that the IMAP connection is monitored and kept alive
by NOOP commands. When the duration has expired, the IMAP connection is
closed and reopened for another period of the same duration.
Default: |
print.imap.session.heartbeat-secs |
Interval in seconds between IMAP NOOP commands on inbox folder to keep
IMAP connection alive. Default: |
print.imap.timeout-msecs |
Socket timeout in milliseconds while communicating on an established
IMAP connection. Default: |
See Config Editor on how to set these properties.
4.11.7. Web Print
Web Print is an implementation of Driverless File Transfer Print which allows users to print documents to SavaPage by simply uploading them from their User Web App. See Upload.
Note
Web Print maps to the reserved Queue
/webprint.
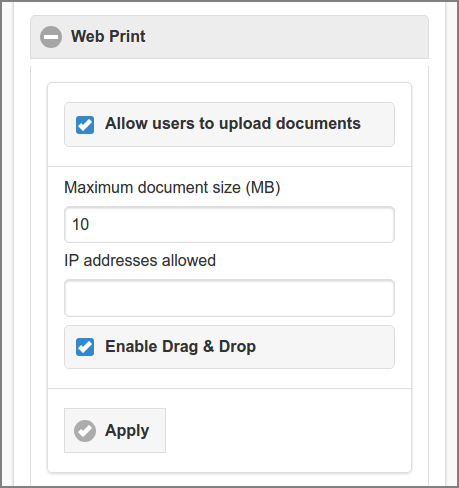
Admin Web App: Options - Web Print
Check the Allow user to upload documents to enable the Web Print function. Then enter the restriction parameters:
Limit the print job size by setting the Maximum document size (MB). Use an integer as value. Leave empty to allow unlimited size.
Enter IPv4 and/or IPv6 address ranges as a CIDR Set at IP addresses allowed to restrict upload based on the requesting IP address. If the field is empty all requesting IP addresses are allowed to upload. See HTTP XFF Header Settings.
Enable Drag & Drop creates a Drop Zone in the User Web App main view. See Upload Drop Zone.
Note
See Processing Driverless PDF Transfer on how uploaded PDF documents are processed.
4.11.8. Internet Print
Secure Driver Printing to
SavaPage over public Internet is activated when port 443 of a
public IP address is forwarded to port 8632 of the private intranet IP
address of the SavaPage server. To authenticate the requesting user
a special Printer URI format is used:
ipps://[host]/printers/internet/[number]/[uuid]
… where [host] is the public DNS name or IP address, and
[number] and [uuid] are the ID Number and UUID of the user. See
ID number,
UUID and
URL Cheat Sheet.
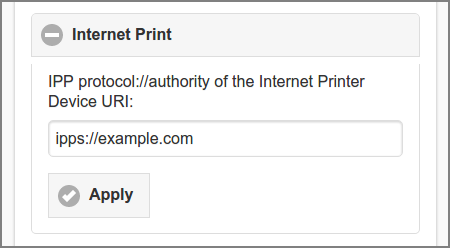
Admin Web App: Options - Internet Print
Enter the protocol://authority of the Internet Printer Device URI as
shown to users and press the Apply button to commit. When the
value is left blank users won’t be able to see their private Internet Printer
Device URI. See Internet Printer.
Important
Internet Print maps to the reserved
Queue /internet. To accept prints
from specific IP addresses see Edit Queue.
Caution
Beware that by enabling Internet Print the SavaPage Web Apps are also accessible over public Internet, so take extra care to protect access to these Apps. See Access over Internet.
4.11.9. Proxy Print
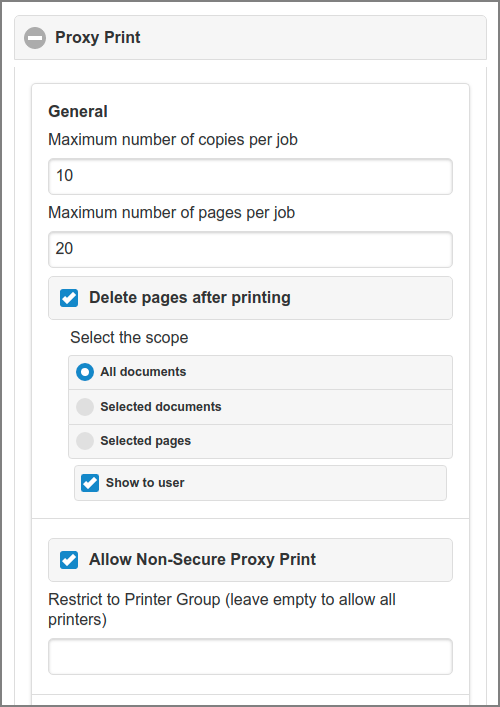
Admin Web App: Options - Proxy Print General
The Maximum number of copies per job restricts the number of copies a user can select in the Print Job Settings. Enter a positive number.
The Maximum number of pages per job restricts the number of pages for proxy print jobs. A proxy print job that exceeds this maximum will be denied. Leave empty to allow unrestricted printing.
To enforce that input documents or pages are deleted after a proxy print, enable Delete pages after printing, and select one of the options below. Also see Print Job Settings.
All documents : all input documents are deleted.
Selected documents : documents for which pages were printed are deleted.
Selected pages : all pages selected for printing are deleted.
Check the Show to user option to inform the user about the delete scope in the Print Dialog.
Check the Allow Non-Secure Proxy Print option if you want to allow users to print to any enabled Proxy Printer from any device. You can optionally restrict non-secure printer access by entering a Proxy Printer Group.
Non-Secure means that users are able to initiate print jobs from locations (desktop, mobile device) remote from the actual printer. This implies that jobs will sit uncollected at the printer, at least for a while. In the mean time, prints containing sensitive information may be read by unauthorized eyes. Or jobs may be forgotten at all, adding up to paper and toner waste.
Any printer that falls beside the non-secure printer pool must be secured by Terminal or Network Card Reader Devices that have a fixed position at the target printer . See Proxy Print Authentication and Custom Proxy Print.
Warning
Configuration item proxy-print.repair.enable is deprecated
and will be removed in a next release. It defaults to N, but if
set to Y a repair action is triggered just before a proxy print.
The “font embedding” and overall cleaning of this
pdftocairo repair will most
likely secure a correct rendering in those cases where the pdf2ps
filter executed by CUPS/Ghostscript will not. Use PDF cleaning during
Driverless PDF Transfer
Processing instead.
Tip
Read all about Proxy Print Scenarios.
4.11.9.1. Proxy Print Modes
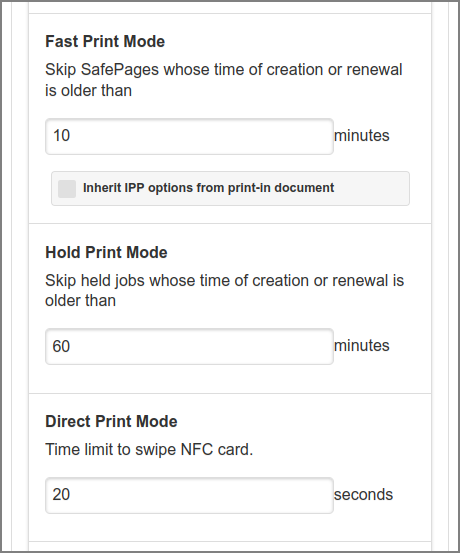
Admin Web App: Options - Proxy Print Modes
The expiration period for each Print Mode can be entered. See:
-
Tick the Inherit IPP options from print-in document checkbox to use IPP options for Fast Print as captured from the PostScript Driver Print-in document. These IPP Options from PostScript are visible in Document Details and Document List Print-in items.
4.11.9.2. Proxy Print Delegation
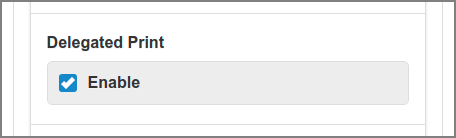
Admin Web App: Options - Proxy Print Delegation
In this section you can Enabled Delegated Print : see Delegated Print and Delegated Print Scenarios.
4.11.9.3. Proxy Print Preprocessing
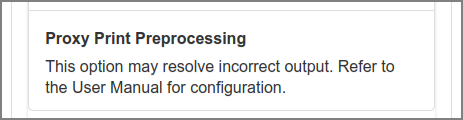
Admin Web App: Options - Proxy Print Preprocessing
If your Proxy Printer instances consistently deliver incorrect print output, preprocessing (converting) the PDF before sending it to CUPS could be a solution. The following global configuration properties apply for all printers:
Configuration property |
Description |
|---|---|
proxy-print.convert |
|
proxy-print.convert.suspend |
|
proxy-print.convert.grayscale |
|
proxy-print.convert.rasterize |
|
proxy-print.convert.rasterize.zero.fonts |
|
proxy-print.convert.rasterize.dpi |
Enum DPI values of rasterized PDF: |
proxy-print.convert.rasterize.max.bytes |
PDF file size (bytes) as limit above which no conversion is done.
Value |
proxy-print.convert.rasterize.max.pages |
Number of PDF pages as limit above which no conversion is done.
Value |
See Config Editor on how to change these properties.
4.11.10. Eco Print
Eco Print is a filter that converts PDF pages to images for eco-friendly proxy printing. The result, including ink and toner savings, is comparable to Ecofont.
There is a difference though. While Ecofont uses True Type Font technology at the start of the print chain (document editing), SavaPage Eco Print uses bitmap technology at the end of the chain. Eco Print intelligently punches holes in all non-white areas of the PDF version of a document, just before proxy printing, downloading or emailing it.
Since Eco Print processes bitmap patterns it is font agnostic and therefore can handle all font types. And, as an extra, it punches graphics along the way. Contrary to Ecofont, which is a non-free Windows only solution, Eco Print is a Libre solution that works for all client platforms since filtering is performed server side.
Warning
The downside of ad-hoc filtering is performance. Eco Print takes about 3 seconds per page (i5 processor, 300 DPI), but is done unobtrusive in the background and need only be done once per PDF document, since the result is cached. Anyhow, Eco Print is not suitable for very large documents.
4.11.10.1. Eco Print Examples
A few Eco Print examples are depicted below.
Plain Print:


Eco Print:


Eco Print magnified:


Eco Print Graphics:
4.11.10.2. Eco Print Settings
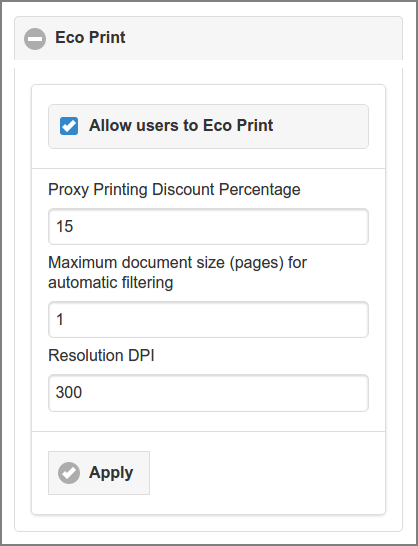
Admin Web App: Options - Eco Print
Check the Allow users to Eco Print to enable the Eco Print function. Then specify:
A Proxy Printing Discount Percentage (integer) to be applied to proxy printing costs as specified for any Proxy Printer. See Edit Proxy Printer.
The Maximum document size (pages) for automatic filtering. In this example the value of “1” means that any document printed to SavaPage with 1 page is automatically filtered in the background. A value of “3” will automatically filter incoming documents of 3 pages or less. A value of “0” disables this automatism.
The Resolution DPI of the Eco Print page image.
4.11.11. Financial
This section holds the options for SavaPage Financial.
4.11.11.1. Currency Code
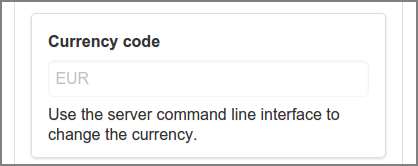
Admin Web App: Options - Financial - Currency
The ISO 4217 currency code of the financial subsystem can be entered here during installation. When the application status is “ready-to-use” the code can only be changed by using a Server Command. See changeBaseCurrency.
4.11.11.2. General Financial Options
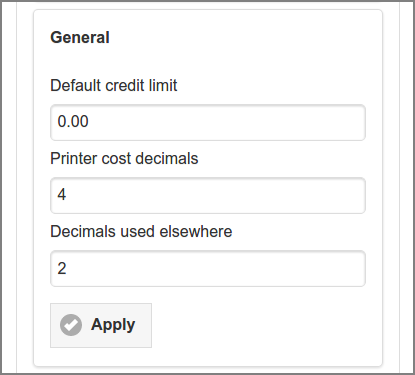
Admin Web App: Options - Financial - General
General options are:
Default credit limit : the default value referenced in Financial. The value must be zero or greater.
Printer cost decimals : the number of decimals (max 6) used to specify and display printer costs. See Media Sources and Manual Media Sizes.
Decimals used elsewhere : the number of decimals (max 6) used to specify financial amounts other than printer costs (e.g. for displaying user account balance).
Note
SavaPage stores financial amounts with a precision of 6 decimals.
4.11.11.3. Point-of-Sale
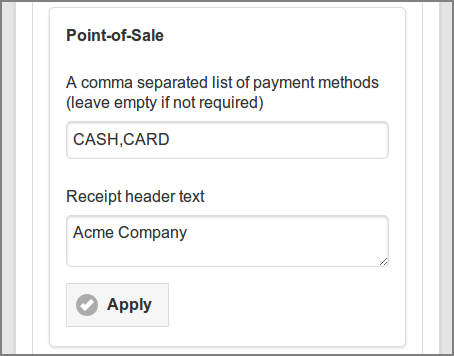
Admin Web App: Options - Financial - POS
These are the options for the Point-of-Sale:
Payment methods: see Deposit.
Receipt header text : typically contains a legal text placed in the Receipt header.
4.11.11.4. Vouchers
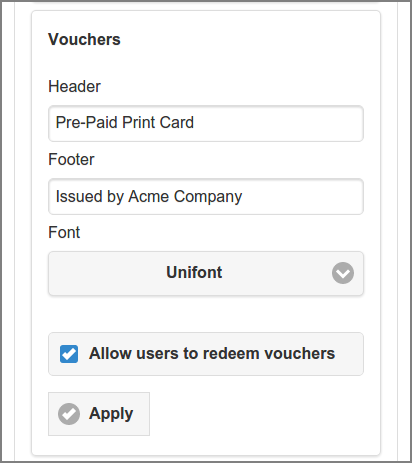
Admin Web App: Options - Financial - Vouchers
These are the options for the Voucher System:
Header : the header text of the voucher card.
Footer : the footer text of the voucher card.
Font : the font used for the PDF Document with vouchers. See Internal Fonts.
You need to explicitly Allow users to redeem vouchers.
4.11.11.5. Transfer Funds
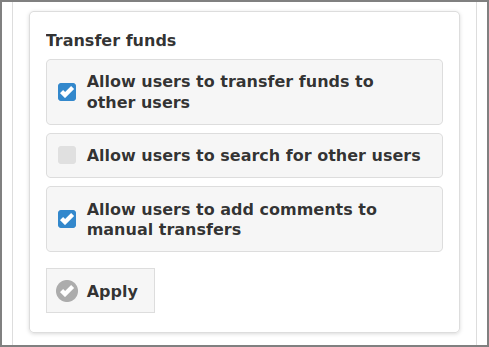
Admin Web App: Options - Financial - Transfer funds
These settings apply to Transfer Credit dialog in the User Web App. Check the options to Allow users to transfer funds to other users , to Allow users to search for other users and to Allow users to add comments to manual transfers.
The minimum and maximum amount to transfer are held in the configuration
properties financial.user.transfers.amount-min and
financial.user.transfers.amount-max. They can be changed with the
Config Editor.
4.11.12. Integration
From a user organization point of view, integration means combining separate software components (subsystems) into one functional system. Currently SavaPage is able to connect to PaperCut to create an integrated Print Management solution.
4.11.12.1. PaperCut Integration
PaperCut is a popular print and copy management software product developed by PaperCut Software. Some functions not present in PaperCut can be implemented with SavaPage as pre-processor and integrator: see PaperCut Integration.
When PaperCut Integration is enabled, connectivity parameters for the PaperCut Server (XML-RPC API) and PaperCut Database (JDBC) can be entered. Press the Apply button to commit the changes. Press the Test button to test the PaperCut connectivity: a message confirming the connection status is displayed.
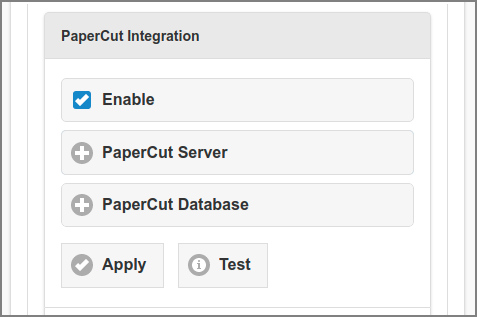
Admin Web App: Options - PaperCut Integration
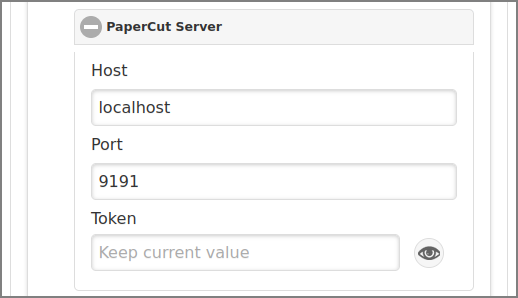
Admin Web App: Options - PaperCut Server
The Token must match the value of the auth.webservices.auth-token
item in the PaperCut Config Editor. Use the 👁 button on
the right side of the entry field to show/hide the token. Leave empty to keep
the current value.
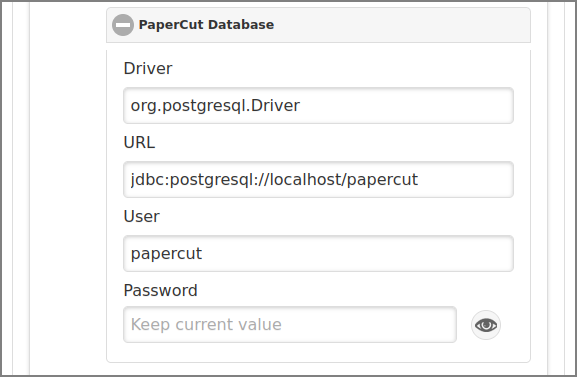
Admin Web App: Options - PaperCut Database
Use the 👁 button on the right side of the Password field to show/hide the password. Leave empty to keep the current value.
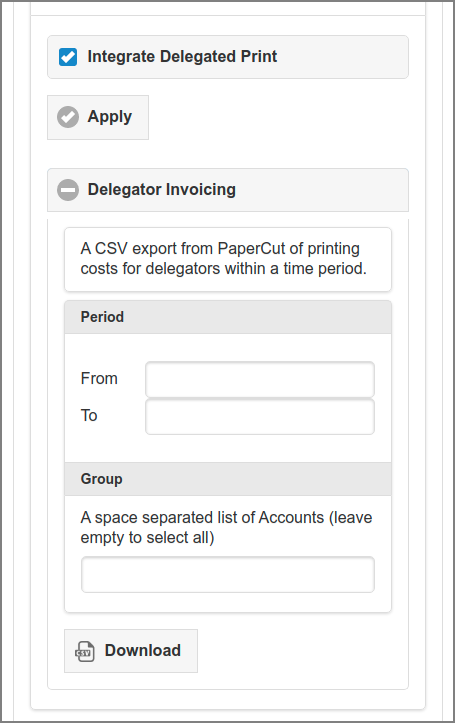
Admin Web App: Options - PaperCut Delegated Print Integration
If Proxy Print Delegation is enabled, the Integrate Delegated Print option is shown. If this option is selected, the Delegator Invoicing subsection is exposed where printing cost totals for delegators from selected Accounts, within a certain time period, can be exported. The result is a CSV file with a line for each delegator. Lines are ordered by user id and specify the cost total within the period and extra data like account and number of transactions per job type, like duplex/simplex, color/grayscale, page format A4, A3, etc. See PaperCut User Prints.
Note
For each Delegator line in the CSV file, a “class” is specified, which is one of the user groups used as selection context for the Delegator total (actually it is the alphanumeric MAX of all contexts involved in the total). Therefore, “class” is only an indication and does not stand for unique group membership. If you want to know what has been charged within a certain selection context, you can specify one or more accounts (classes) as selection.
References:
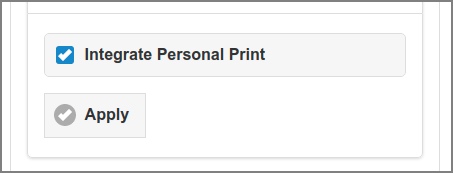
Admin Web App: Options - PaperCut Personal Print Integration
If Proxy Print Delegation is disabled, Integrate Personal Print comes into play. With this setting enabled, Personal Print jobs are monitored in PaperCut.
References:
4.11.13. Backups
The Backups section shows the backup location and time of the last backup.
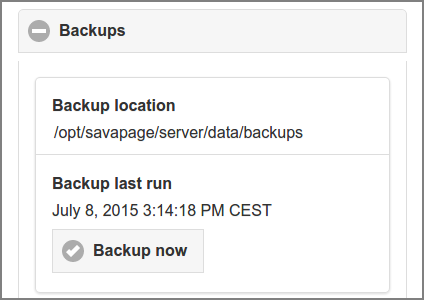
Admin Web App: Options - Backups
Press the Backup Now button to launch the backup process in the background. The progress and result of the process is not echoed real-time in this section, but can be monitored in the Real-time Activity section of the Dashboard. Also see db-export and db-export-to.
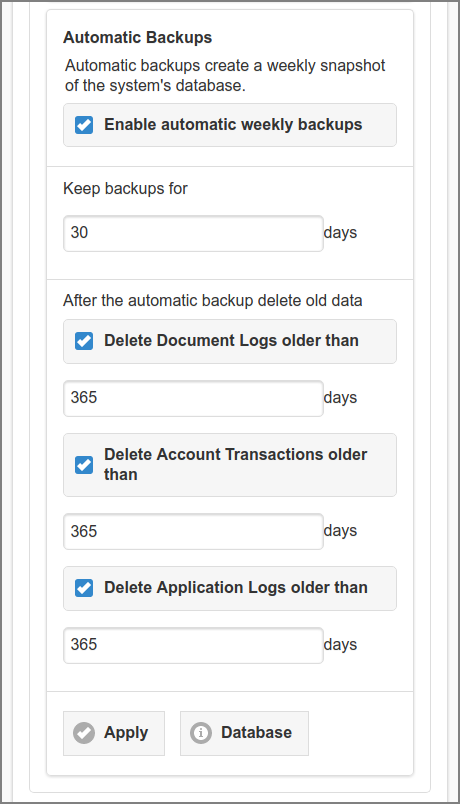
Admin Web App: Options - Automatic Backups
The Automatic Backups section holds options for creating weekly snapshots of the database.
Tick the Enable automatic weekly backups checkbox to enable the process. See Weekly Jobs.
The number of days a backup should be kept, must be entered at Keep backups for.
A purge of old log data, executed after the backup, can be activated by selecting the Delete older than check-boxes for Application Logs, Document Logs and Transaction Logs. Enter the number of days the logs should be held.
Press the Apply button to commit the changes.
Press the Database button to show a pop-up with the number of documents (received, printed, downloaded) and transactions in the database.
4.11.14. Advanced
4.11.14.1. User Client Authentication
The User Client uses the system account name of the user to identify itself to the SavaPage server.
In a strict Single Sign-On (SSO) environment, where a user is already logged in and authenticated as domain user, the system account name can be trusted by default.
In environments where non-domain systems are allowed, local accounts are not authenticated by domain services, and therefore can not be trusted.
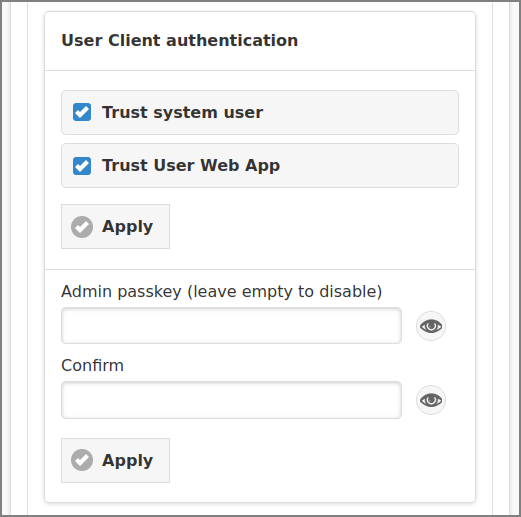
Admin Web App: Options - Advanced - User Client
User Client uses the system account name as user identification (unless overridden by a command line option).
If Trust system user is enabled the User Client will trust the system account name.
If Trust system user is disabled the User Client will pop-up a login dialog to authenticate the user, unless the following trust sources are available:
If Trust User Web App is enabled and the user is already authenticated in a User Web App on the same IP address, User Client will trust the Web App user as user identification.
If an administrator uses the secret Admin passkey in the start-up script it will enforce trust of the offered user identification. See User Client. Use the 👁 button on the right side of the entry fields to show/hide the passkey.
Press the Apply buttons to commit the changes.
4.11.14.2. User Name Aliases Cache
User Name Aliases are stored in a file whose contents are read and cached when the SavaPage service is started. You can Refresh the cache after editing the file’s content.
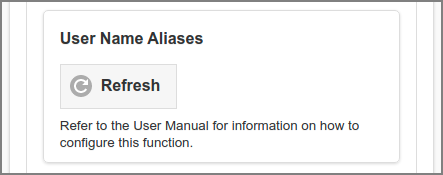
Admin Web App: Options - Advanced - User Name Aliases
4.11.14.3. Admin Password
The Reset internal admin password section is the place to change the master password for the built-in admin account.
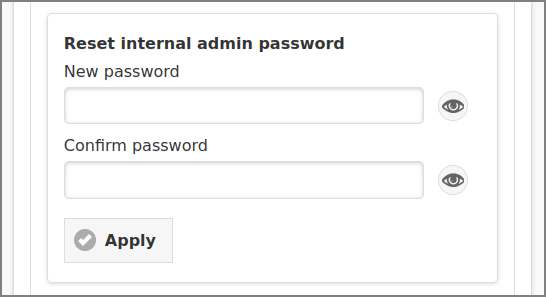
Admin Web App: Options - Advanced - Reset Admin Password
Enter the new password twice at New password and Confirm password.
The password must contain the same minimum number of characters as defined for Internal Users. See Create Internal User.
Use the 👁 button on the right side of the entry fields to show/hide the password.
Press the Apply button to commit the change.
Caution
Keep the new password at a secure place, since it is the master key to your system.
4.11.14.4. JMX Agent
SavaPage runs in a Java Virtual Machine, which has built-in instrumentation that enables client applications to monitor and manage it with the help of Java Management Extensions (JMX). SavaPage configures the built-in JMX agent for remote monitoring, so it can be securely accessed by remote client management applications, such as Java VisualVM or JConsole.
This section shows the JMX remote process connection string, and enables
you to reset the admin connection password. Use the 👁
button on the right side of the entry fields to show/hide the password.
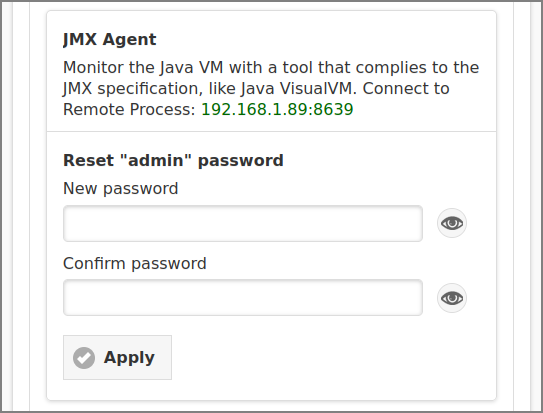
Admin Web App: Options - Advanced - JMX Agent
Java VisualVM is the standard Java JMX client that was first bundled
with the Java Development Kit (JDK) version 6, update 7. It can be found
in JDK_HOME/bin, where JDK_HOME is the directory where the JDK
is installed.
If JDK_HOME/bin is in your system path, you can start Java VisualVM
by simply typing jvisualvm in a command (shell) prompt. Otherwise,
you have to type the full path to the executable file.
Since SavaPage enforces SSL for remote JMX communication,
jvisualvm needs to be started with two special parameters referring
to the Java truststore, holding the trusted SSL certificate, and the
truststore password.
The shared client directory
/opt/savapage/client/jmx contains the JMX server certificate
jmxremote.crt, a ready to use jmxremote.ts truststore, and a
sample GNU/Linux and Mac shell script jmxremote.sh and Windows
command file jmxremote.cmd to start jvisualvm with the right
parameters.
Note
The password of the provided jmxremote.ts truststore is:
savapage. Of course you are free to import jmxremote.crt into
your own truststore and use it with your own password.
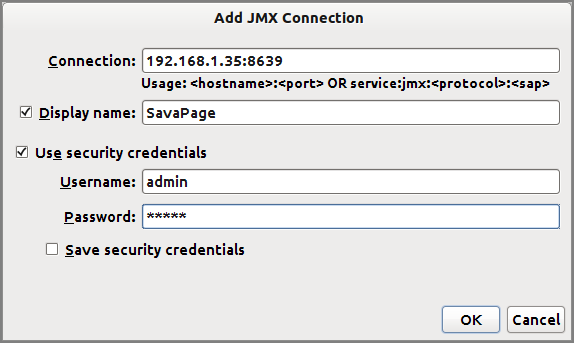
Add JMX Connection with Java VisualVM
Add a new JMX Connection and enter the IP address and port number of the
Connection and as shown in the JMX Agent section, in our case this would
be 192.168.1.35:8639.
Enter the Username admin and the Password
as set in the JMX Agent section above. Press the OK button to save
the connection and start it from the Java VisualVM Applications pane.
Older JDK versions have JConsole as standard JMX client. If you want to
use JConsole copy and edit the scripts in
/opt/savapage/client/jmx so jconsole is used instead of the
default jvisualvm.
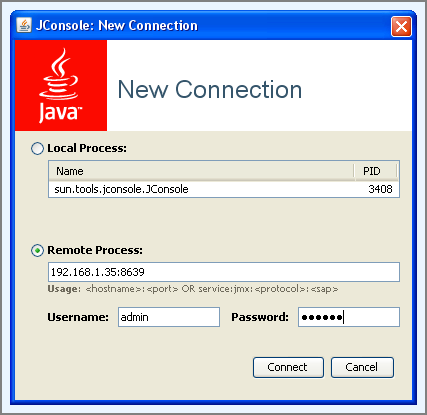
Connecting to Remote Process with JConsole
When starting JConsole it prompts you to enter the parameters for the
New Connection. Select the Remote Process option and enter the IP
address and port number as shown in the JMX Agent section, in our case
this would be 192.168.1.35:8639.
Enter the Username admin and the Password
as set in the JMX Agent section above. Press the Connect button
to open the connection.
More information about the JMX configuration can be found in Secured JMX Connection.
4.11.14.5. Locale
Enter the System Locale string at the Locale section.
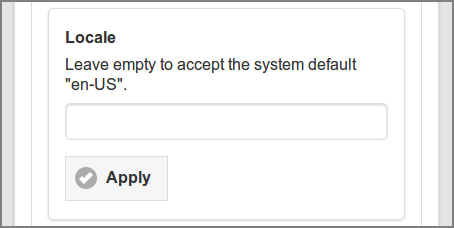
Admin Web App: Options - Advanced - Locale
The format of the locale conforms to IETF BCP 47.
Some examples are:
en,en-GB,en-US,nl,nl-NL,nl-BE.You can leave the locale empty to accept the system default.
The locale is applied to all system messages which are logged in the system log or send by email.
Press the Apply button to commit the change.
Note
This system locale is not used for the language and country default
used in the Web App. The Web App default is picked up from the locale
settings of the Web browser, optionally overruled by the language
and country URL parameters. See
URL Cheat Sheet.
4.11.14.6. Default Paper Size
The Default Paper Size is used as the paper size for the printed
document of a Printable File Type which
itself does not have a document structure with a clearly defined page
size. These types typically include HTML, TXT and images offered via
Web Print and
Mail Print.
The Default Paper Size is also used as media-default for
the SavaPage IPP Everywhere and AirPrint printer.
Choose Letter or A4, or accept the system default.
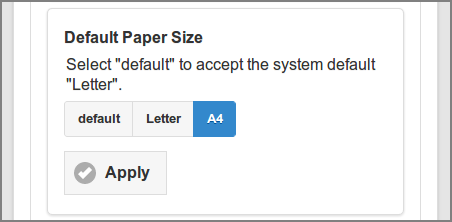
Admin Web App: Options - Default Paper Size
See Set Default Paper Size on how to set the system default.
4.11.14.7. Report Font
The Report Font is used as default font for all PDF reports.
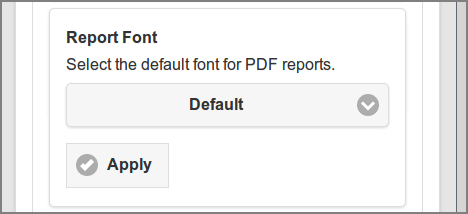
Admin Web App: Options - Default Paper Size
See Internal Fonts.
4.11.14.8. Converters
Converters are used to convert files offered for printing via Web Print or Mail Print to PDF. This is the place to enable the converters. For installation see:
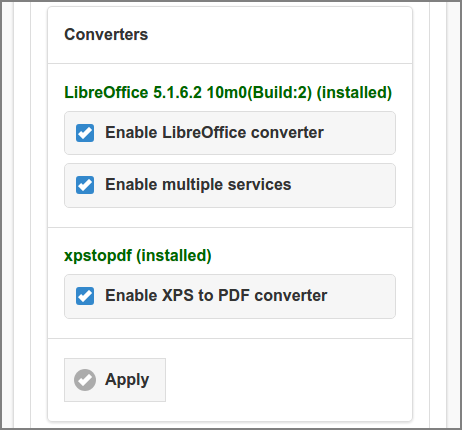
Admin Web App: Options - Converters
If Enable multiple services is checked, the
Enable LibreOffice converter acts as multi-threaded
load-balancing service for easy upscaling of conversion throughput.
The configuration properties that determine the behavior of this service
are summarized in the table below. The defaults will work fine in most
situations. By adding extra soffice.connection.ports you can enhance
conversion throughput, as long as hardware resources permit.
Warning
Tuning LibreOffice configuration values is an advanced task. Please consult your SavaPage Service Provider about which values give the best performance in your situation. Then use the Config Editor to change the defaults.
Configuration property |
Description |
|---|---|
soffice.home |
The LibreOffice home location. When empty, a probe to likely candidates is performed to retrieve the location. Default: empty. |
soffice.profile.template-dir |
When empty, a temporary profile directory is created for each UNO connection process with its own defaults settings. Otherwise, this configuration property must provide a profile directory containing customized settings. This template directory will be copied to the temporary profile. Default: empty. |
soffice.connection.ports |
A comma/space separated list of TCP/IP ports to localhost LibreOffice
(UNO) connection instances to be launched by SavaPage.
Default: |
soffice.connection.restart-task-count |
The number of executed tasks after which a UNO connection is restarted.
if |
soffice.task.queue-timeout-msec |
Wait time (milliseconds) for a UNO connection to become available for
task execution. Default: |
soffice.task.exec-timeout-msec |
Wait time (milliseconds) for a conversion task to complete.
Default: |
soffice.respond.retry-msec |
Retry interval (milliseconds) for host process to respond.
Default: |
soffice.respond.timeout-msec |
Wait time (milliseconds) for host process to respond (after retries).
Default: |
soffice.start.retry-msec |
Retry interval (milliseconds) for host process to start. Default: |
soffice.start.timeout-msec |
Wait time (milliseconds) for host process to start (after retries).
Default: |
4.11.14.9. SafePages
This section contains advanced options regarding encrypted PDF and the expiration of SafePages input documents.
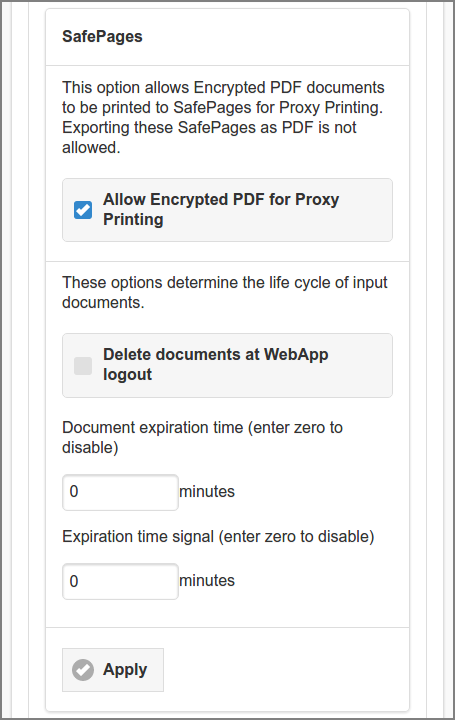
Admin Web App: Options - Advanced - Proxy Printing
If the Allow Encrypted PDF for Proxy Printing option is enabled, Encrypted PDF documents with Printing as allowed action, are accepted as SafePages. However, SavaPage will protect the encryption of the original document, i.e. its pages are not allowed to be exported (downloaded or send) as PDF, directly, or as part of a composite document. When this option is disabled, all Encrypted PDF files are rejected. Encrypted PDF can be offered by:
SavaPage as Printer: see explanation in Printing Encrypted PDF.
Web Print or Mail Print: host package QPDF must be installed so PDF can be decrypted. If not installed, Encrypted PDF is rejected despite allowing it with the option above.
Configuration property print-in.pdf.encrypted.allow with value Y (default) or N is responsible for allowing Encrypted PDF for Proxy Printing.
If Delete documents at Web App logout is checked all print-in documents are deleted when the users logs out.
Document expiration time manages the input document life cycle.
Any document older than the number of entered minutes is considered
expired and will be automatically deleted. For instance, a value of
1440 will delete the SafePages document 24 hours after it was
printed. The expiration time is shown in the Document
Details dialog. The user
is notified by pop-up
after an expired document is auto-deleted. User action is required to
close the pop-up. This way we are sure the user noticed the delete
and expectation is set right.
When a user logs out and logs in again after some time, expired documents will be auto-deleted to begin with, but the user will not be notified of this event.
Expired documents whose deletion is not triggered by an active User Session or Fast Print release are eventually deleted during User Home Clean.
Use the Expiration time signal value to signal the user when
expiration is due. For instance, a value of 15 will mark the
document thumbnails
with a clock icon in a colored (orange) footer, 15 minutes before
expiration. This will alert the user, so he can do some last minute
actions on old documents.
Press the Apply button to commit the changes.
4.11.14.10. Document Store
Admin Web App: Options - Advanced - Document Store
Document Store is a generic solution to store and retrieve different kind of documents. In particular, documents Printed to SavaPage, Downloaded as PDF or printed to Proxy Printers. Each kind of document is persisted in a separate storage branch, based on its source or destination.
Documents are either stored for an extended or limited period of time. These two period types correspond with two types of stores: Archive for long-term, and Journal for short-term storage.
When in a use case, Archive and Journal are both applicable for the same branch, the Archive branch takes precedence to store the document.
Document Store is persisted on the host file system, as described in appendix_title: path
/opt/savapage/server/data/doc-archiveand/opt/savapage/server/data/doc-journal.Documents are stored with their metadata in a unique identifying file path of year, month, day, hour and document UUID. Expired documents are deleted at a daily schedule. Deletion is a technical operation where file path branches are pruned according to their timestamp fingerprint [23]. If you want to keep a branch beyond the time limit, make sure to back-up the corresponding file path in time.
Stored documents can be retrieved (downloaded) from the Document Log in all Web Apps.
Currently Print Archive and Print Journal branches are supported for Proxy Print Jobs. When needed other branches can be implemented.
Consult Proxy Printer Identity on how to disable Print Archive and Print Journal for individual printers.
See User Privileges on how to enable storage access for User Groups.
Print Archive shows how the Archive option is presented in the Print Job Settings dialog.
Use the following configuration properties:
Configuration property |
Description |
|---|---|
doc.store.enable |
Set to |
doc.store.free-space-limit-mb |
The minimum MB of free space needed. When free space falls below this
value, the store will be disabled till more space is available.
Default: |
Archive branch
|
|
doc.store.archive.enable |
Set to |
doc.store.archive.out.enable |
Set to |
doc.store.archive.out.print.enable |
Set to |
doc.store.archive.out.print.days-to-keep |
Number of days a Print Out Archive document is kept in store.
Default: |
doc.store.archive.out.pdf.enable |
reserved for future use |
doc.store.archive.out.pdf.days-to-keep |
reserved for future use |
doc.store.archive.in.enable |
reserved for future use |
doc.store.archive.in.print.enable |
reserved for future use |
doc.store.archive.in.print.days-to-keep |
reserved for future use |
Journal branch
|
|
doc.store.journal.enable |
Set to |
doc.store.journal.out.enable |
Set to |
doc.store.journal.out.print.enable |
Set to |
doc.store.journal.out.print.days-to-keep |
Number of days a Print Out Journal document is kept in store.
Default: |
doc.store.journal.out.pdf.enabl |
reserved for future use |
doc.store.journal.out.pdf.days-to-keep |
reserved for future use |
doc.store.journal.in.enable |
Set to |
doc.store.journal.in.print.enable |
Set to |
doc.store.journal.in.print.days-to-keep |
Number of days a Print In Journal document is kept in store.
Default: |
See Config Editor on how to set these properties.
4.11.14.11. Telegram Messaging
Warning
Telegram support is deprecated and will be removed in a next release.
This option allows SavaPage to send Telegram messages. For instance, 2-Step Verification Codes. In order to send messages, first follow the steps below to register a Telegram Bot.
Open your Telegram client, search for
@BotFatherand start a conversation.Send
/newbotto start the bot setup process.Send the name of the bot, e.g. “My Org SavaPage bot”.
Send the username of the bot, e.g. “com_example_savapage_bot”.
BotFather confirms that a new bot has successfully been set-up and provides the HTTP API access token to you, for example:
123456789:AAbbCCddEEffGGhhIIjjKKllMMnnOOppQQ
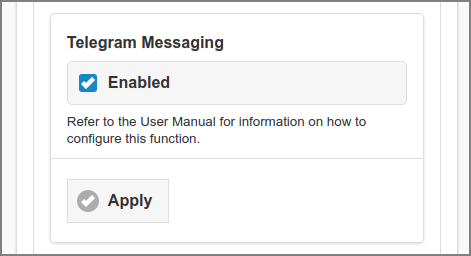
Admin Web App: Options - Advanced - Telegram Messaging
Activate Telegram Messaging by checking the Enabled button and by entering the Bot username and access token as configuration properties (see table below).
Now users can open Telegram Configuration and follow the instructions to initiate a conversation with the Telegram Bot and register their Telegram ID.
Configuration property |
Description |
|---|---|
ext.telegram.bot.username |
Telegram Bot username. |
ext.telegram.bot.token |
Telegram HTTP API access token provided by BotFather. |
See Config Editor on how to set these properties.
4.11.14.12. Atom Feed
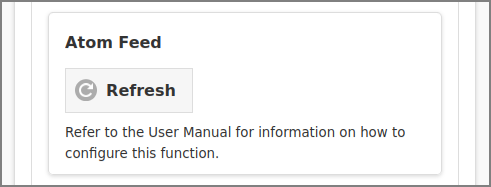
Admin Web App: Options - Advanced - Atom Feed
Press the Refresh button to publish an Atom Feed outside the publication schedule. See Atom Feed Service.
4.11.14.13. Matrix Messaging
This section is visible depending on Matrix configuration properties. See Matrix Messaging Service.
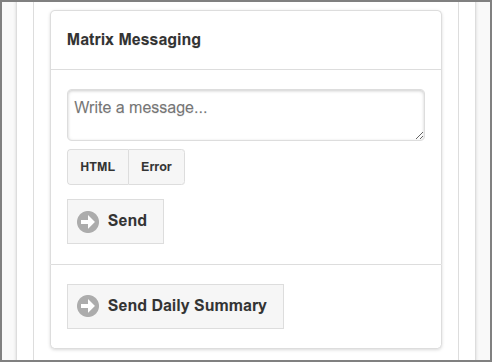
Admin Web App: Options - Advanced - Matrix Messaging
Press the Send button to send a message, optionally formatted as HTML and/or as Error.
Press the Send Daily Summary button to send an ad hoc daily summary outside the messaging schedule.
4.11.14.14. Pagometers
In analogy with the term Odometer, the term Pagometer is coined as an instrument to count the number of processed pages of SavaPage input and output documents.
Pagometers are used to display usage statistics and Printing Impact from a global viewpoint as in the Dashboard, or in specialized views for User and Users, Queues and Proxy Printers.
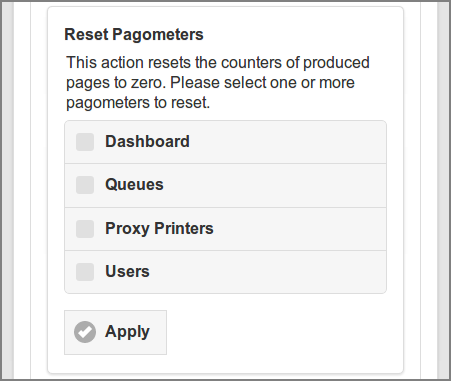
Admin Web App: Options - Advanced - Pagometers
The counters can be reset in the Reset Pagometers section.
Tick the checkboxes of the pagometers to reset.
Press the Apply button to execute the action.
4.11.15. Config Editor
Most of the SavaPage configuration properties can be edited in dedicated sections of the Admin Web App. However, many extra properties are present without an editing interface. Luckily a generic Configuration Editor is available for editing individual configuration properties, so the defaults of “hidden” properties can be changed when needed.
Warning
If you use the Config Editor incorrectly, you may cause serious problems which can only be fixed by re-installation of the application. Use the Config Editor at your own risk.
Tap the Configuration Editor (advanced) button to start the editor. See Admin Web App: Configuration Editor - List for a detailed description.
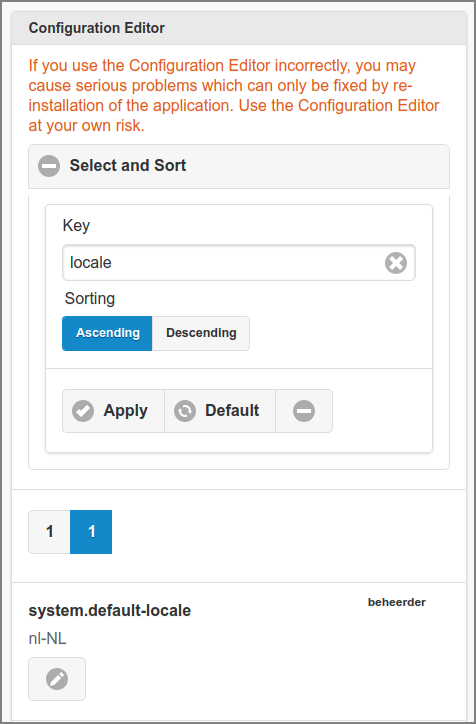
Admin Web App: Configuration Editor - List
All configuration properties are listed alphabetically by default with their key and value. Secret values are encrypted and shown as
********in the list, see Encrypted Secrets.Push the Select and Sort button to expand (collapse) the section.
The list can be traversed by tapping one of the buttons at the pager at the top or bottom of the page.
Select items by entering a fragment) of their key. So, entering “ldap” will select “auth.ldap.port” and “ldap.schema.group-member-field”.
The list can be sorted Ascending or Descending on name.
Tap the Apply button to (re)display the list.
A tap on the Default button resets the selection and sort field to their default values.
Tap the 🖊 Edit button to edit the item. See Admin Web App: Configuration Property - Edit.
Important
Due to Admin Privileges the 🖊 Edit button might not be visible.
Note
The Configuration Editor can also be launched from the Action Pop-up Menu at the footer of Admin Web App.
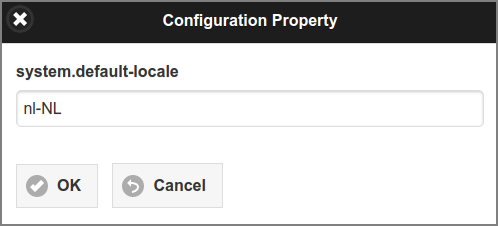
Admin Web App: Configuration Property - Edit
The value of the item is shown in the entry field and can be edited.
Press the OK button to commit the change and return to the list.
The Cancel button brings you back to List without changing anything.
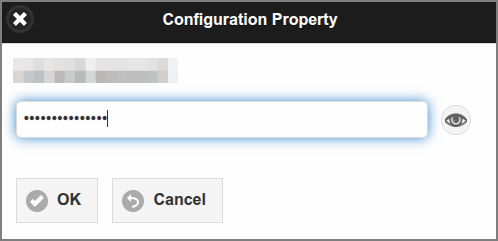
Admin Web App: Configuration Property - Edit Secret
Secret values are shown in a password entry field.
Use the 👁 button on the right side of the entry field to show/hide the secret.