SavaPage User Manual

Front matter

  • 1. Preface

Chapters

  • 1. Introduction
  • 2. Server Installation
  • 3. User Web App
  • 4. Admin Web App
    • 4.1. Login
    • 4.2. Menu
    • 4.3. Dashboard
    • 4.4. Users
    • 4.5. Groups
    • 4.6. Accounts
    • 4.7. Queues
    • 4.8. Proxy Printers
    • 4.9. Devices
    • 4.10. Reports
    • 4.11. Options
    • 4.12. Documents
    • 4.13. Log
    • 4.14. About
    • 4.15. Vouchers
  • 5. Job Tickets Web App
  • 6. Mail Tickets Web App
  • 7. Point-of-Sale Web App
  • 8. Payment Web App
  • 9. Print Site Web App
  • 10. PDF/PGP Verification
  • 11. User Client
  • 12. SavaPage Financial
  • 13. SavaPage on GNU/Linux
  • 14. SavaPage as Printer
  • 15. Authenticated Printing
  • 16. Printing Impact
  • 17. Security
  • 18. Freedom and Privacy
  • 19. Internationalization
  • 20. Customization
  • 21. Using an External Database
  • 22. Tuning
  • 23. SavaPage Community

Appendix

  • 1. Proxy Print Scenarios
  • 2. NFC Authentication
  • 3. Tools
  • 4. Capacity Planning
  • 5. URL Cheat Sheet
  • 6. File Locations
  • 7. Printable File Types
  • 8. Upgrading from a Previous Version
  • 9. Migrating to a New Server
  • 10. Advanced LDAP Configuration
  • 11. PPD Extensions
  • 12. IPP Extensions
  • 13. SavaPage Plug-ins
  • 14. PaperCut Integration
  • 15. Job Scheduling
SavaPage User Manual
  • 4. Admin Web App
  • 4.2. Menu
  • View page source
Previous Next

4.2. Menu

After a successful login this main Admin screen is shown. If this is a first time login, a message will show, telling you that SavaPage needs to be set up and is not ready to use yet. The message will prompt you to go to the Options section and to check the settings. A long as setup is not completed this message will keep appearing after login. When setup is completed, a similar message will appear when the password of the internal admin account still has the default value.
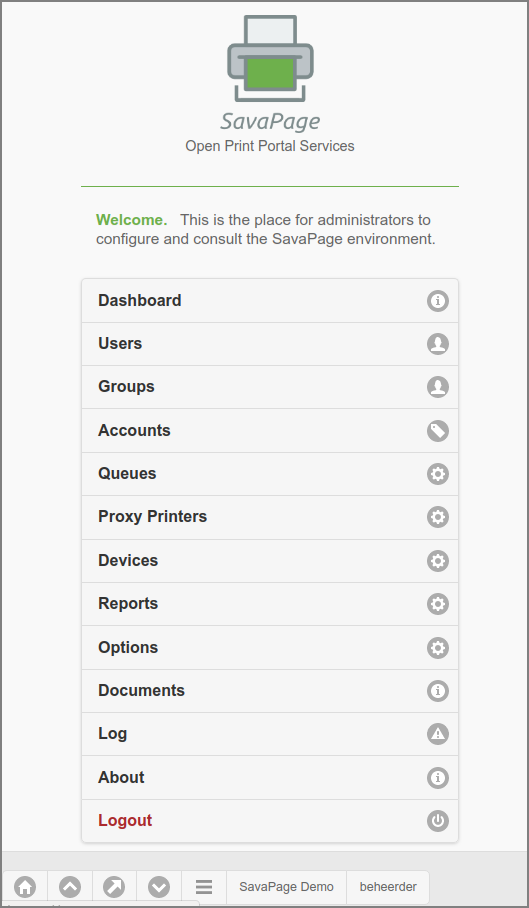
Admin Web App: Menu

Admin Web App: Menu

A tap on a the Logout button brings you back to the Login screen. A tap on any other menu option brings a detailed screen into view. See the sections below for a description of each menu option:

  • Dashboard

  • Users

  • Groups

  • Accounts

  • Queues

  • Proxy Printers

  • Devices

  • Reports

  • Options

  • Documents

  • Log

  • About

  • Vouchers

These are the buttons in the footer and their function:

Button

Function

../../_images/sp-01-00-admin-nav-page-top.png

Navigate to the top of the page

../../_images/sp-01-00-admin-nav-menu-top.png

Navigate to the top of the menu.

../../_images/sp-01-00-admin-nav-detail-top.png

Navigate to the top of the detail panel.

../../_images/sp-01-00-admin-nav-page-bottom.png

Navigate to the bottom of the page.

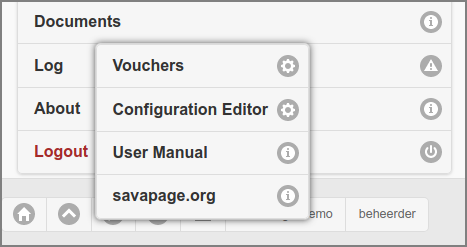
../../_images/sp-01-00-admin-action-popup.png

Show pop-up menu with additional actions as shown in the figure below.

Admin Web App: Action Pop-up Menu

Admin Web App: Action Pop-up Menu

See the sections below for a description of menu options:

  • Vouchers.

  • Config Editor.

Note

Due to Admin Privileges certain menu options might not be visible.

The User Manual and savapage.org menu items open in a new browser tab.

At the leftmost of the footer is a button with the name of your Organization as used in public communications. When pushed it opens the About dialog. A label with the logged-on user id closes the ranks.

Previous Next

© Copyright 2011-2026 by Rijk Ravestein, CC BY-SA 4.0.

Built with Sphinx using a theme provided by Read the Docs.