3.11. Upload
3.11.1. Upload Dialog
This dialog implements the SavaPage Web Print function, and is shown after a tap on the Upload button in the footer of the main panel.
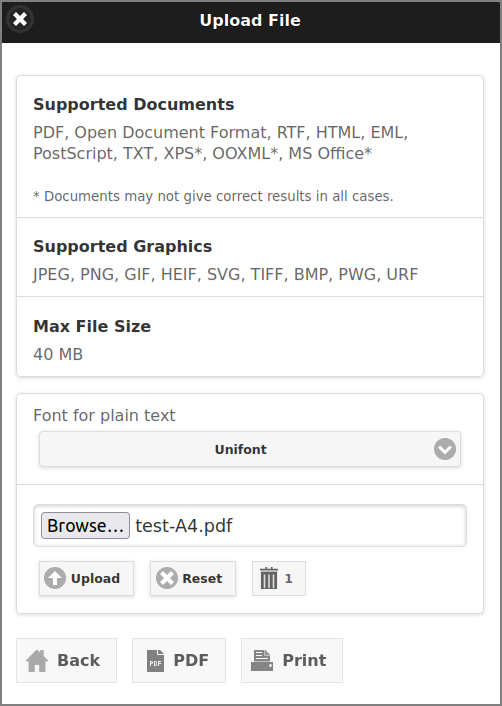
Web Print: Upload File
Font for plain text : change the font when you upload a plain text file (TXT) that contains characters not supported by the Default font, like CJK. Use Unifont if the source text has a real broad Unicode coverage.
Choose Files to be uploaded. Beware that the actual file selection button differs from browser to browser.
Press the Upload button to start the upload.
The status of the upload will be displayed below the selected file name.
The Reset button clears the status messages and selected file.
The wastebasket 🗑 button shows the number of (uploaded) documents currently present in the SafePages inbox. When you press this button, all documents will be deleted, and the button hidden (until the inbox is filled again).
After the upload, use the Back, Print or PDF buttons to navigate to the next step.
Supported Document and Graphics can be restricted with the following configuration properties:
Configuration property |
Description |
|---|---|
web-print.graphics.enable |
Enable graphics files for Web Print:
Y (default) or N. |
web-print.file-ext.exclude |
A comma or space separated list of file extensions
(without leading point), that are excluded for Web Print.
For example:
rtf,html,ps,txt. When TXT file type isexcluded, the Font for plain text selection in the Upload File
dialog is removed.
|
See Config Editor on how to set these items.
Note
For uploaded file types that do not have a page size defined (HTML, TXT) the default paper size is used. For image files the graphic involved is a best fit on the default paper size.